
Introduction: Dockerising a Python Flask App
Docker lets you quickly deploy microservices, cloud-native architectures, or web apps. In this post, we will use Docker to create a reliable environment for Flask applications that efficiently manages dependencies and deployment intricacies.
What is Docker?
Docker is a platform for developers and sysadmins to build, deploy, and run applications inside containers. Containers are a form of lightweight virtualisation that allows you to package an application, along with its dependencies and libraries, in a single unit that can run on any infrastructure.
This makes creating, managing, and deploying applications easier, especially in a microservices architecture, where an application comprises many small, self-contained services.
In addition to providing an isolated environment for your applications, Docker offers several other benefits, such as increased consistency and reproducibility, better resource utilisation, and easier scaling and deployment.
Docker was developed by Docker, Inc., a company founded in 2010. Docker became popular quickly and was widely adopted by organisations and developers for containerisation. In 2011, Docker, Inc. was acquired by Mirantis, a company specialising in cloud infrastructure software, see Adrian Ionel’s post What We Announced Today and Why it Matters.
Installing Docker (macOS, Windows, Linux)
These steps cover the installation process for Docker on macOS, Windows and Ubuntu Linux. If you use a different Linux distribution, you may need to adjust the package manager commands accordingly.
Refer to the official Docker documentation for installation instructions on other Linux distributions: https://docs.docker.com/install.
Firstly, you will go to download Docker Desktop from their website at https://www.docker.com/products/docker-desktop.
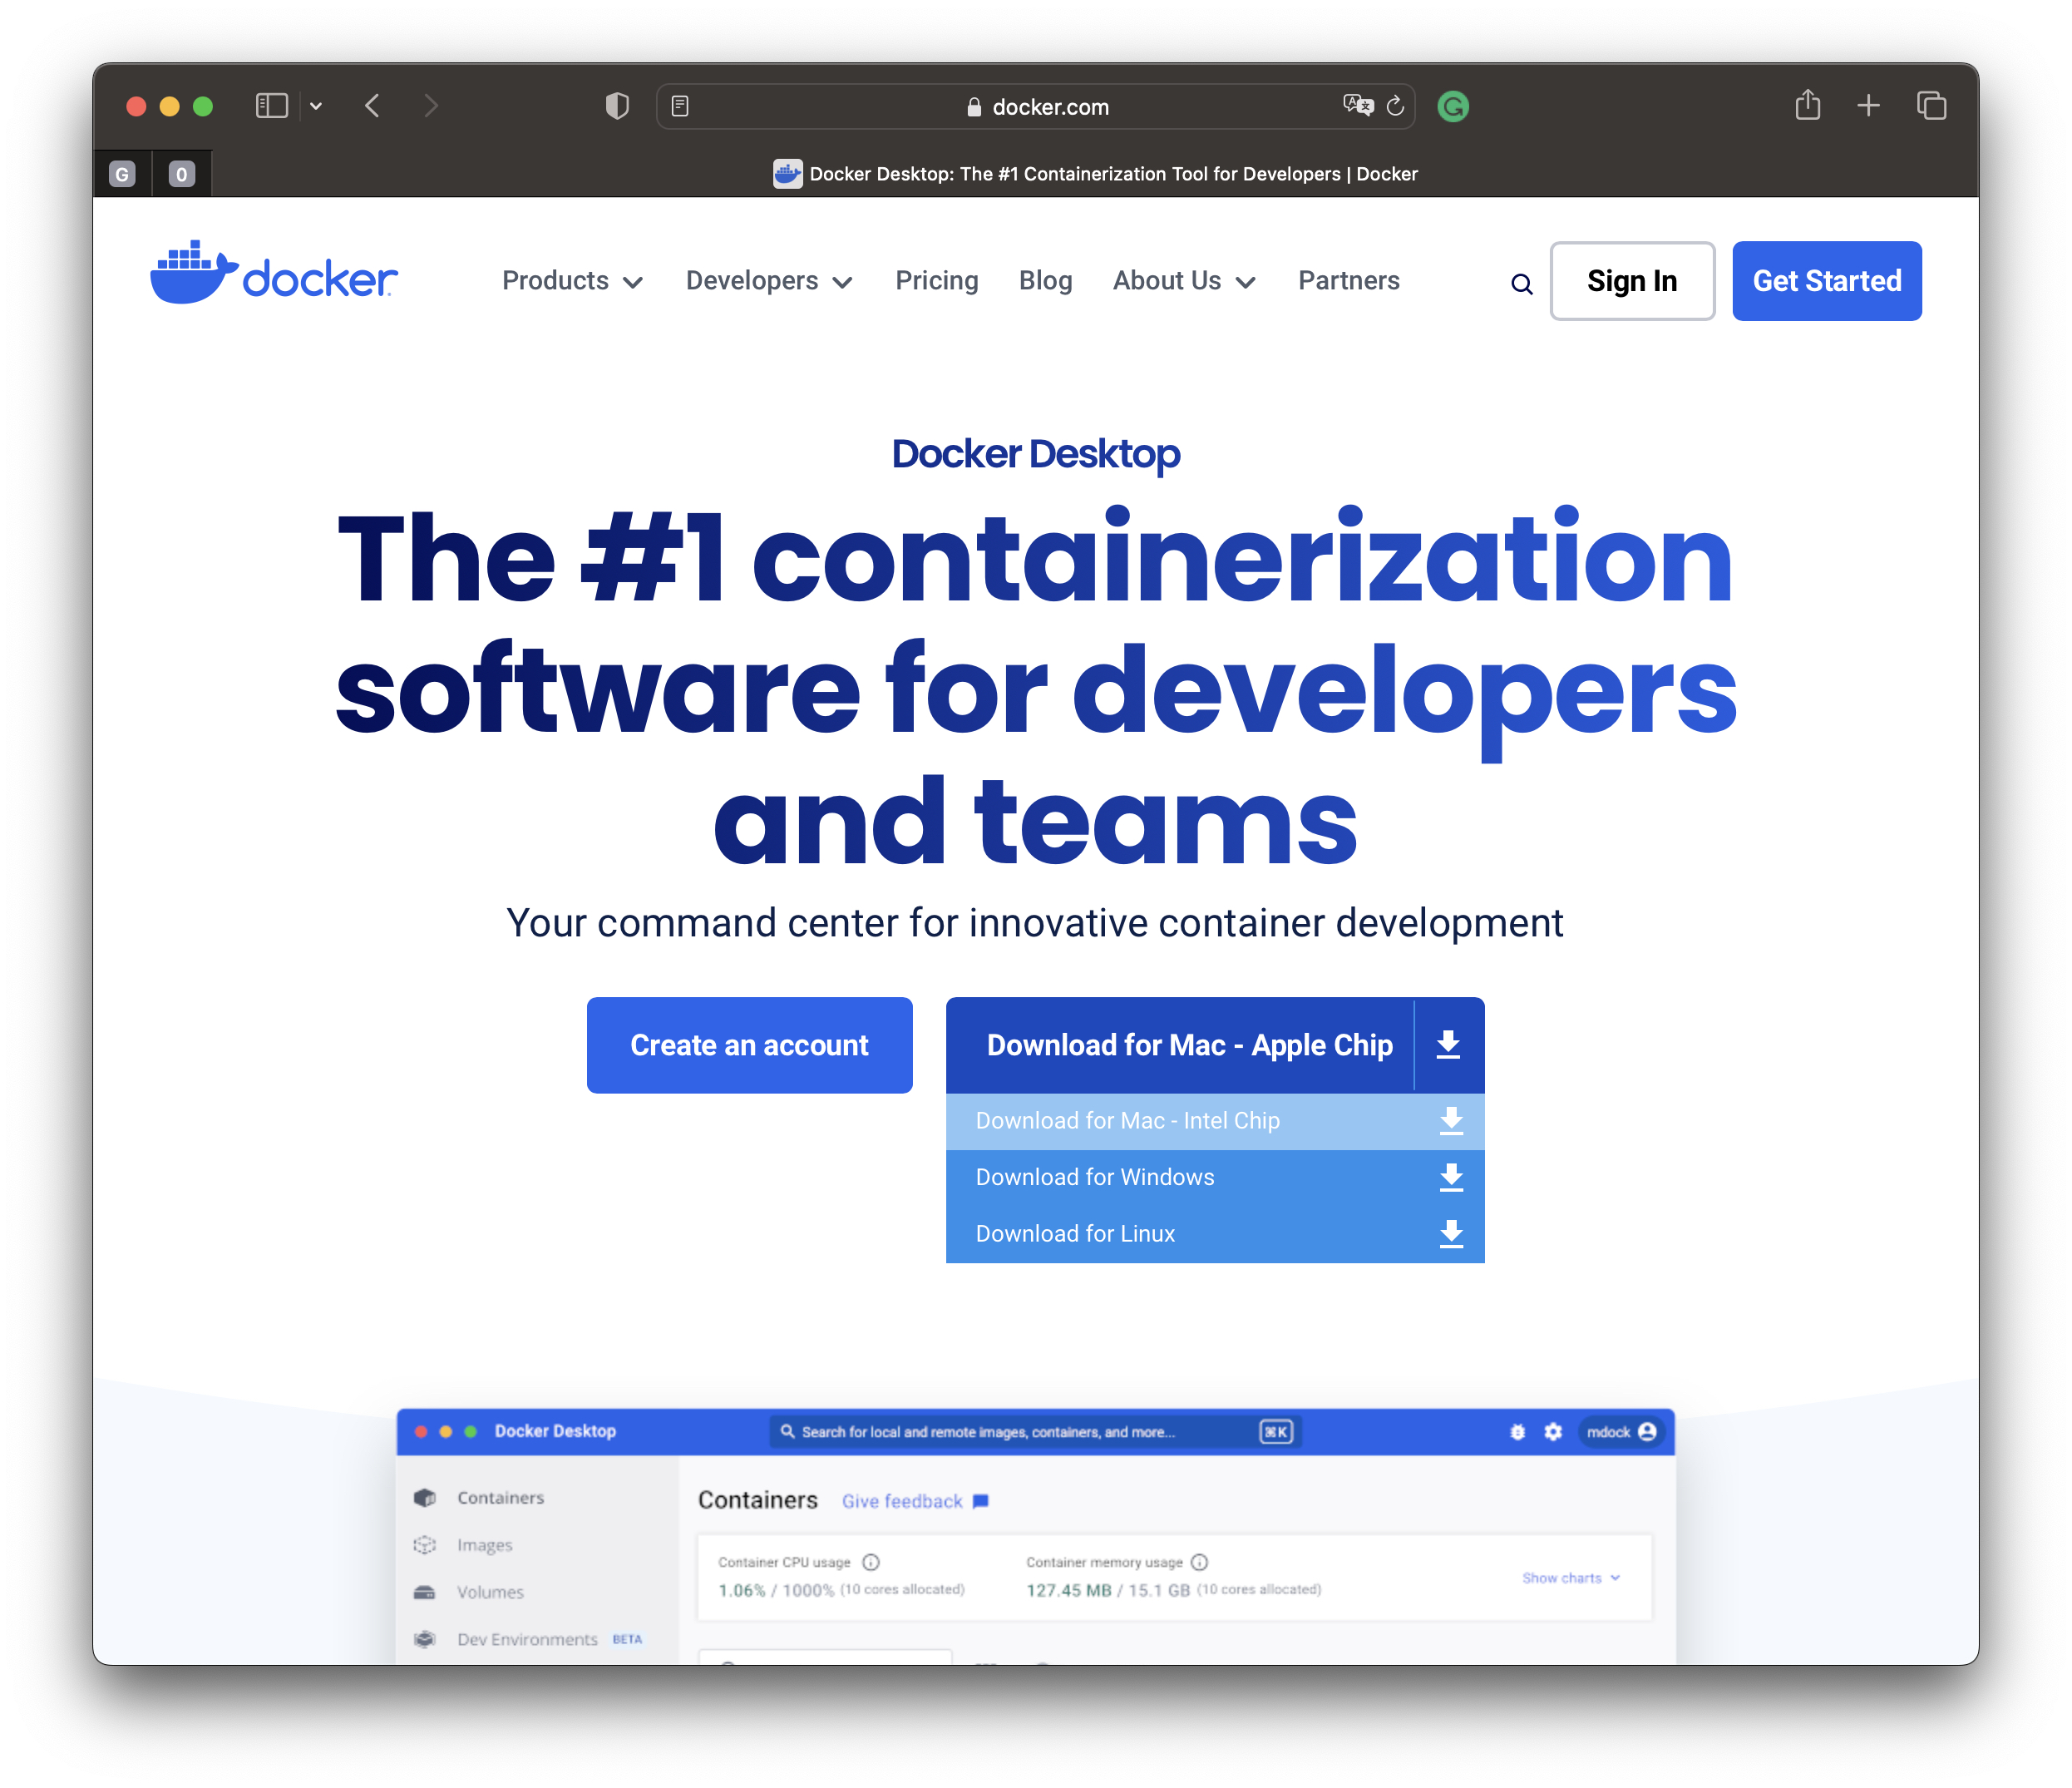
Docker Website
macOS
At the Docker website at https://www.docker.com/products/docker-desktop, click on the “Download for Mac” button to download the Docker Desktop for Mac.
- Install Docker Desktop:
- Once the download is complete, open the Docker.dmg file.
- Drag the Docker icon to the Applications folder to install the Docker Desktop.
- Run Docker Desktop:
- Open the Applications folder and find Docker.
- Double-click on the Docker icon to start the Docker Desktop.
- Sign in (Optional):
- If you have a Docker Hub account, sign in to Docker Desktop to access additional features and services. This step is optional.
- Allow Docker Permissions (if prompted):
- During installation, Docker may request permission to access specific system resources. Allow these permissions for Docker to function correctly.
- Start Docker Desktop:
- You should see the Docker icon in your menu bar once the installation is complete. Click on it to open Docker Desktop.
- Verify Installation:
- Open a terminal and run the following command to verify that Docker is installed and running:
docker --versionThis should display the installed Docker version.
Docker version 20.10.16, build aa7e414
- Open a terminal and run the following command to verify that Docker is installed and running:
- Test Docker:
- Run a simple test to ensure Docker is working correctly. Open a terminal and run:
docker run hello-worldThis command will download a test image and run a container that prints a message. If everything is set up correctly, you should see a message indicating that your Docker installation is working.
- Run a simple test to ensure Docker is working correctly. Open a terminal and run:
That’s it! You have successfully installed Docker on your macOS system. You can now use Docker to run containers and manage containerised applications.
Windows
At the Docker website at https://www.docker.com/products/docker-desktop, click on the “Download for Windows” button to download Docker Desktop for Windows.
- Install Docker Desktop:
- Run the installer you downloaded (typically
Docker Desktop Installer.exe). - Follow the on-screen instructions to install Docker Desktop.
- Run the installer you downloaded (typically
- Start Docker Desktop:
- Once the installation is complete, Docker Desktop should start automatically. Look for the Docker icon in your system tray.
- Sign in (Optional):
- If you have a Docker Hub account, sign in to Docker Desktop to access additional features and services. This step is optional.
- Verify Installation:
- Open a PowerShell or Command Prompt and run the following command to verify that Docker is installed and running:
docker --versionThis should display the installed Docker version.
- Open a PowerShell or Command Prompt and run the following command to verify that Docker is installed and running:
- Test Docker:
- Open a PowerShell or Command Prompt and run:
docker run hello-worldThis command will download a test image and run a container that prints a message. If everything is set up correctly, you should see a message indicating that your Docker installation is working.
- Open a PowerShell or Command Prompt and run:
Linux
To install Docker on Ubuntu:
- Update Packages:
sudo apt-get update - Install Docker Dependencies:
sudo apt-get install -y apt-transport-https ca-certificates curl software-properties-common - Add Docker GPG Key:
curl -fsSL https://download.docker.com/linux/ubuntu/gpg | sudo gpg --dearmor -o /usr/share/keyrings/docker-archive-keyring.gpg - Add Docker Repository:
echo "deb [arch=amd64 signed-by=/usr/share/keyrings/docker-archive-keyring.gpg] https://download.docker.com/linux/ubuntu $(lsb_release -cs) stable" | sudo tee /etc/apt/sources.list.d/docker.list > /dev/null - Install Docker Engine:
sudo apt-get update sudo apt-get install -y docker-ce docker-ce-cli containerd.io - Start Docker Service:
sudo systemctl start docker - Enable Docker to Start on Boot:
sudo systemctl enable docker - Verify Installation:
docker --version - Test Docker:
docker run hello-world
Why Docker?
Docker is a tool used for containerising and deploying applications. It provides a platform-agnostic containerisation solution, packaging applications and dependencies into isolated containers.
Here are some use cases where Docker is commonly employed:
-
Web Applications: Docker is popular for deploying web applications, including Flask, Django, Ruby on Rails, Node.js, and more.
-
Microservices: Docker is well-suited for creating and managing microservices architectures, enabling each service to run in its own container.
-
Databases: Docker containers can encapsulate databases such as MySQL, PostgreSQL, MongoDB, etc., making it easy to manage different database instances.
-
API Services: RESTful APIs and other backend services can be containerised using Docker for easy deployment and scaling.
-
DevOps and Continuous Integration/Continuous Deployment (CI/CD): Docker is integral to modern CI/CD pipelines, enabling consistent environments across development, testing, and production stages.
-
Machine Learning and Data Science: Docker containerises machine learning models, data processing pipelines, and other data science workflows.
-
Networking Services: Networking components, such as load balancers, reverse proxies, and DNS servers, can be containerised to simplify deployment and management.
-
Desktop Applications: While less common, Docker can also package and distribute desktop applications with their dependencies.
The flexibility and consistency offered by Docker containers make it a valuable tool for a broad spectrum of applications, providing scalability, portability, and ease of deployment benefits.
Using Docker
Dockerfile
With Docker, you can define your application and its dependencies in a Dockerfile, a text file containing instructions for building a Docker image.
You can then use the Docker CLI to build and run containers based on your image. Docker provides a centralised repository called Docker Hub, where you can store and share your images with others.
Python App in Docker
Let’s create a simple Python code example that prints “Hello, Docker” to the console. We’ll create a Docker image that runs this code in a container.
Here’s the Python code:
print("Hello, Docker")
Next, we’ll create a Dockerfile that specifies the image we want to build.
# Use an existing Python image as the base image
FROM python:3.9-alpine

# Set the working directory in the container
WORKDIR /app

# Copy the Python code into the container
COPY . .

# Run the Python code when the container is started
CMD ["python", "hello-docker.py"]
Now, we can build the Docker image using the following command in the terminal:
docker build -t hello-docker .
Finally, we can run a container based on the image with the following command:
docker run hello-docker
This will start a new container and run the Python code, printing “Hello, Docker” to the console.
You can stop a running Docker container using the docker stop command and specifying the container ID or name.
Here’s the basic syntax:
docker stop [OPTIONS] CONTAINER [CONTAINER...]
For example, if you have a running container named “my-container”, you can stop it with the following command:
docker stop my-container
Alternatively, you can find the container ID of the running container by using the docker ps command, which lists all running containers:
docker ps
The output will look something like this:
CONTAINER ID        IMAGE               COMMAND             CREATED             STATUS              PORTS               NAMES
678901234567        hello-docker        "python hello-docker.py"   2 hours ago        Up 2 hours                         my-container
You can then stop the container by using the container ID:
docker stop 678901234567
By default, the docker stop command sends a SIGTERM signal to the process running in the container. If the process doesn’t exit within a default timeout of 10 seconds, the command will send a SIGKILL signal, which terminates the process immediately. You can change the timeout using the –time or -t option.
You can change the timeout when stopping a Docker container using the –time or -t option. This option specifies the number of seconds to wait for the container to stop before sending a SIGKILL signal.
Here’s an example of using the –time option to stop a container with a timeout of 5 seconds:
docker stop --time 5 my-container
Or you can use the -t option, which is equivalent:
docker stop -t 5 my-container
In this example, the docker stop command will wait 5 seconds for the process running in the container to exit. If the process doesn’t exit within the specified time, a SIGKILL signal will be sent to the process to terminate it.
Copy instruction
In a Dockerfile, the COPY instruction is used to copy files or directories from the build context (the directory containing the Dockerfile) into the container’s file system. The syntax for the COPY instruction is:
COPY source destination
sourcerefers to the files or directories in the build context that you want to copy into the image.destinationis the path in the container where the files or directories will be copied.
For example, if you have a directory structure like this:
.
├── Dockerfile
└── app
    ├── file1.txt
    └── file2.txt
And your Dockerfile contains the following line:
COPY app/ /usr/src/app/
All contents of the app/ directory in the build context will be copied to the /usr/src/app/ directory in the container.
If you want to copy a single file, you can specify the file directly:
COPY file.txt /path/in/container/
Here, file.txt from the build context will be copied to /path/in/container/ in the container.
It’s important to note that the COPY instruction is used during the build phase, not during the container’s runtime. Any changes made to the files in the build context after the COPY instruction won’t affect the image unless the Dockerfile is rebuilt.
Signing up
I recommend signing up for a Docker Desktop account, providing several benefits:
-
Access to Docker Hub: Docker Hub is a cloud-based registry service that allows you to share and manage Docker images.
-
Private Repositories: You can create private repositories on Docker Hub, which can be helpful if you want to keep your Docker images private and share them only with specific individuals or teams.
-
Image and Container Management: The Docker Desktop account provides a web-based interface for managing your Docker images and containers without using the command line.
-
Automatic Updates: Docker Desktop can be configured to check for updates automatically and download them.
-
Beta Channel Access: Docker Desktop may have a beta channel that provides early access to new features, allowing you to test and provide feedback on upcoming changes.
-
Desktop Application Integration: Some additional features and integrations with desktop applications may be available to Docker Desktop account users.
Docker Desktop
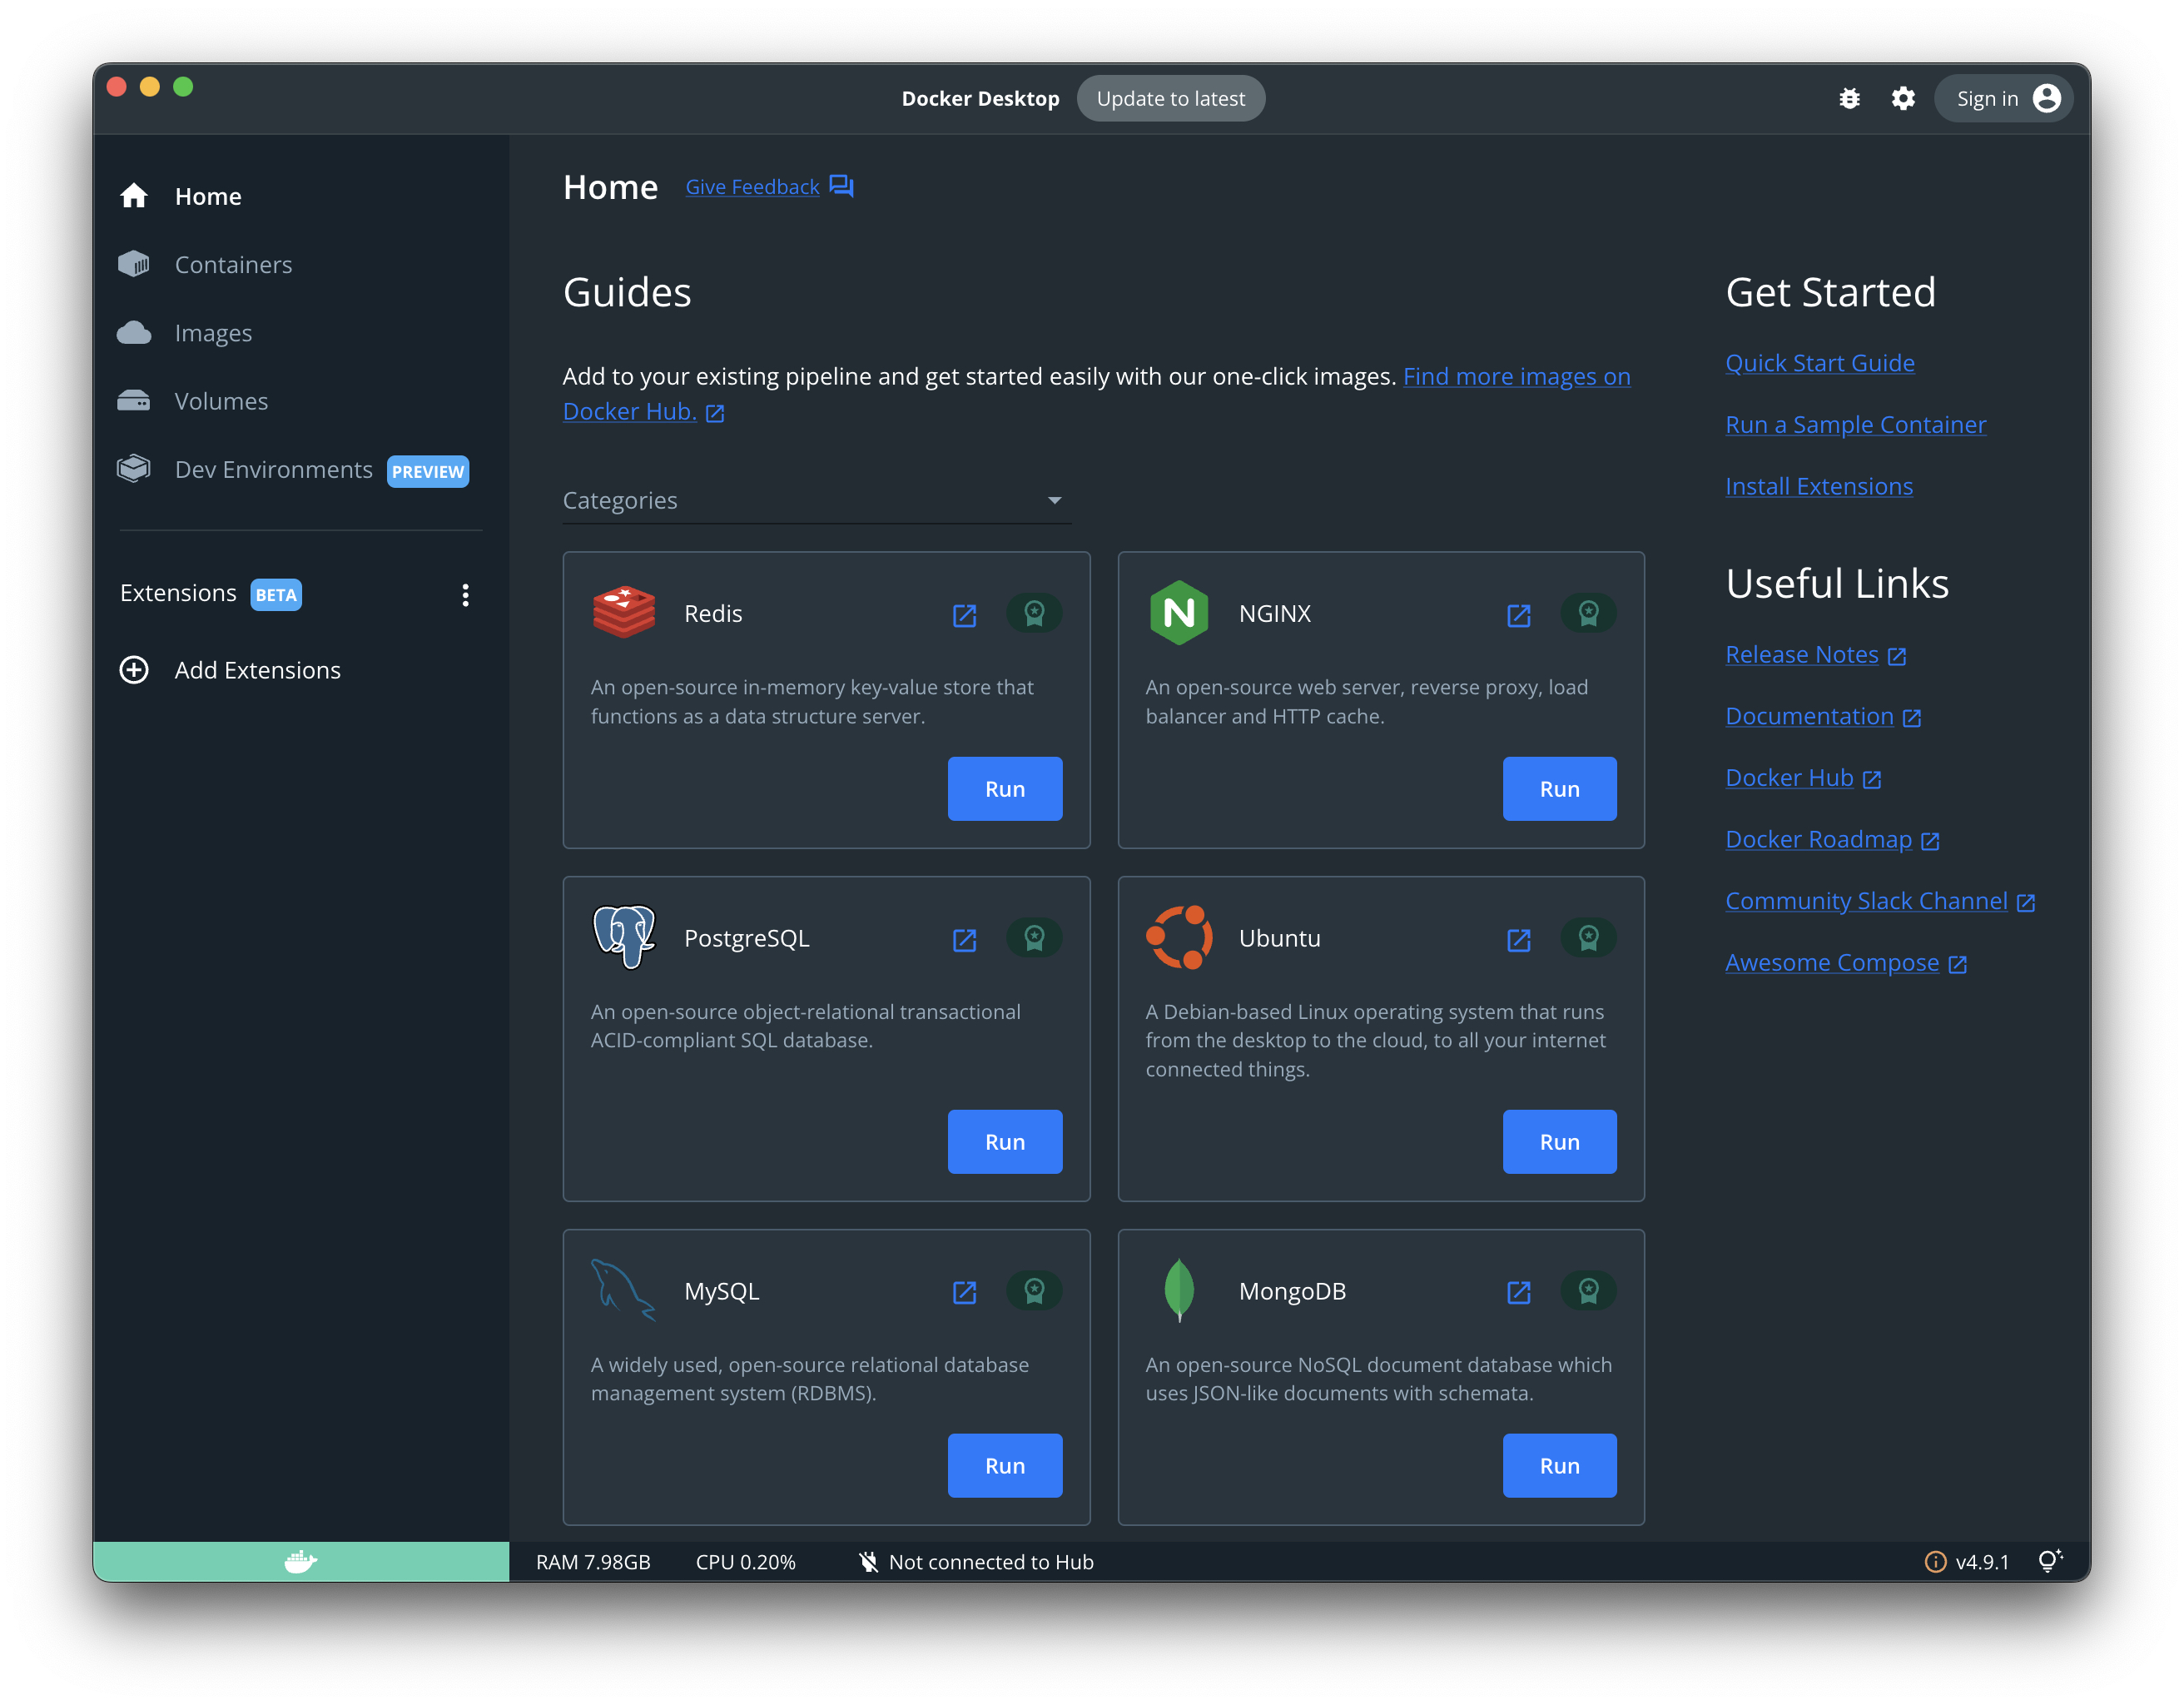
Docker Desktop
Docker images
Docker images are self-contained packages, including everything needed to run software.
A Dockerfile specifies instructions to create an image with a base image, application code, and dependencies. The Docker engine processes the file to produce the final image.
Docker images can be stored in a registry and run on any host with Docker. This makes it easy to distribute and run applications consistently without worrying about the infrastructure.
Docker creates an isolated environment for the container to run as an isolated process on the host operating system. It shares the host’s kernel but has its own file system, network, and resources.
Images simplify deploying and scaling apps by allowing easy movement and running on different hosts. They also enable multiple containers to share the same codebase while running in separate isolated environments, which is useful in a microservices architecture.
Here are some of the most commonly used Docker commands for working with images:
- docker images: This command lists all the images stored on the host.
- docker pull [image_name]: This command downloads an image from a registry, such as Docker Hub, to the host.
- docker build [OPTIONS] [DOCKERFILE_PATH]: This command builds an image from a Dockerfile, which specifies the instructions for creating the image.
- docker push [image_name]: This command uploads an image to a registry.
- docker tag [image_name] [new_image_name]: This command creates a new image with a specified name, which can be useful for tagging an image with a specific version number or for pushing an image to a different registry.
- docker rmi [image_name]: This command removes one or more images from the host.
- docker inspect [image_name]: This command provides detailed information about an image, including its configuration, layers, history, and metadata.
- docker save [image_name] > [filename.tar]: This command saves an image as a tar archive, which can be useful for sharing images or for creating backups.
- docker load < [filename.tar]: This command loads an image from a tar archive, which can be useful for restoring a saved image or for importing an image from another host.
- These are some basic commands for working with Docker images. You can use them to build, manage, and distribute Docker images effectively.
Docker Hub
Docker Hub is a cloud-based service by Docker, Inc., for storing, sharing, and distributing Docker images globally. Docker Hub is a widely used platform to store, manage, and distribute Docker images. It integrates well with the Docker engine and other tools in the ecosystem.
Docker Hub is a registry for Docker images. It allows users to store, manage, and share their images. Docker Hub includes automated builds and webhooks to simplify building and testing images and triggering actions based on events.
Docker Hub offers tools for managing and collaborating on images, including organising images in repositories, access control, and managing image tags and versions.
Docker Hub is free for public images and offers a range of plans for private images, including free and paid options.
Here are some examples of using Docker Hub from the command line on macOS:
Pulling an image from Docker Hub:
docker pull [image_name]
For example, to pull the official Nginx image from Docker Hub, you can run:
docker pull nginx
Logging in to Docker Hub:
docker login
This command will prompt you for your Docker Hub username and password, which you can use to authenticate and access private images stored on Docker Hub.
Pushing an image to Docker Hub:
docker push [image_name]
For example, to push an image called “my-image” to Docker Hub, you can run:
docker push my-image
Tagging an image for Docker Hub:
docker tag [image_name] [registry/image_name]
For example, to tag an image called “my-image” with the repository name “my-repo” on Docker Hub, you can run:
docker tag my-image docker.io/my-repo/my-image
docker tag my-image docker.io/my-repo/my-image
docker tag my-image docker.io/my-repo/my-image
These are some basic examples of using Docker Hub from the command line on macOS. Using these commands, you can interact with Docker Hub to pull, push, and manage images and collaborate with others to build and distribute Docker images.
Docker AI
Docker AI was officially introduced on October 5th, 2023 at DockerCon, an annual conference for the Docker community. It was unveiled alongside an overall AI/ML integration initiative within Docker. This included partnerships with companies like LangChain, Neo4j, and Ollama to build a “GenAI Stack” to develop generative AI applications quickly. Read more at Docker Announces Docker AI, Boosting Developer Productivity Through Context-Specific, Automated Guidance.
Here are the leading Docker AI features explained simply:
1. Automated guidance: Docker AI suggests best practices and recommendations while you configure and troubleshoot your AI application. Imagine it as a helpful assistant for your Docker tasks.
2. Image selection: It helps you choose the most secure and up-to-date Docker image from a vast library for your AI model, saving time and effort.
3. Context-awareness: It understands your needs based on your code and actions, providing relevant guidance instead of generic advice.
4. Resource management: Docker AI suggests efficient ways to spin up resources like databases for your AI models, simplifying your development process.
5. Generative AI tools: Docker is expanding into generative AI (think ChatGPT), offering pre-built tools and frameworks to speed up the development of AI applications that can create text, code, and other creative content.
Overall, Docker AI aims to boost developer productivity and simplify AI application development by providing intelligent assistance and streamlining everyday tasks.
Dockerising a Flask application
I always like to give a practical example of learning by doing. In my post Joking Flask App, we have created a simple web application that shows a random joke. The source code is in my repository flask-random-joke.
Let’s convert this Flask app into a Docker image and run it in Docker.
First, create a folder “dockerised_joker” and “cd”.
mkdir dockerised_joker
cd dockerised_joker
Managing dependencies
When developing applications, we can use virtualenv to manage dependencies. We usually store the dependencies in the requirements.txt file. This file is used in the Dockerfile for installing required packages.
If you haven’t already, create a file named requirements.txt in your project directory. List all the Flask and other dependencies your app needs. The requirements file can be easily used to install the packages automatically with:
pip install <package_name> -r requirements.txt
Our requirements.txt file contains only Flask pckage:
Flask==2.2.5
Cloning your repository
We can use ‘git clone’ to clone our repository locally:
git clone https://github.com/edaehn/flask-random-joke.git
Yes, we have it downloaded in an eye blink! We have a new folder, “flask-random-joke”, with the local source code files.
Dockerfile creation
Next, we create a new file named Dockerfile in the root directory of your project.
I like using Nano editor to create the file: “nano Dockerfile”.
FROM python:3.11

COPY . /flask-random-joke

RUN pip install --upgrade pip && pip install -r /flask-random-joke/requirements.txt

WORKDIR /flask-random-joke

EXPOSE 5000

CMD ["flask", "run", "--host", "0.0.0.0"]
Let’s go line-by-line to explain the Dockerfile contents:
FROM python:3.11
- This line specifies the base image for your container. We’re using
python:3.11, which provides a clean and minimal Python 3.11 environment.
COPY . /flask-random-joke
- This line copies all the files from your current directory (represented by
.) to a directory named/flask-random-jokeinside the container. This assumes your Flask app’s code and dependencies are in the current directory.
WORKDIR /flask-random-joke
- This line sets the working directory within the container to
/flask-random-joke. This ensures subsequent commands are executed within this directory where your app’s files reside.
RUN pip install –upgrade pip && pip install -r /flask-random-joke/requirements.txt
- This line upgrades the
pippackage installer within the container. While not strictly necessary, having an updatedpipensures smoother dependency installation.
Next, it installs all the required dependencies for your Flask app. It uses the requirements.txt file located in the /flask-random-joke directory, assuming it lists all the necessary packages you need.
EXPOSE 5000
- This line informs Docker that your application uses port 5000. This is necessary for mapping the container’s port to a port on your host machine when you run the container.
CMD [“flask”, “run”, “–host”, “0.0.0.0”]
- This line defines the command to execute when you start the container. It uses the
flaskcommand with therunsubcommand to launch your Flask app. The--hostflag ensures the app listens on all available interfaces within the container (not just localhost).
Remember to:
- Replace
/flask-random-jokewith the directory name where your app resides if it’s different. - Ensure your
requirements.txtfile is accurate and up-to-date. - Adapt the port number in the
EXPOSEdirective if your app uses a different port.
Building the Docker Image
Notice if you want to share your image publicly, create a Docker Hub account (https://hub.docker.com/).
Indeed, you will need to open the Docker daemon for this. Just start Docker Desktop, and you are ready to go.
To build an image, we open the terminal in your project directory and run the following:
docker build -t <image_name>:<tag> .
Replace <image_name> with your desired name (e.g., my-flask-app) and <tag> with a version tag (e.g., latest).
For instance, the -t flag tags your image with the name “joker”, tagged as “latest”, and docker looks for the Dockerfile in the project directory:
docker build -t joker:latest .
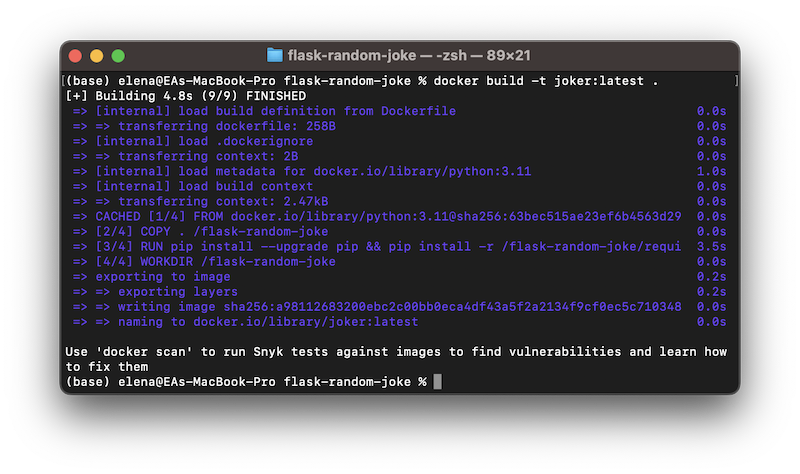
Building up the dockerised Joker application
Running the Docker Container
To run the container, we use the following command:
docker run -d -p <host_port>:<container_port> <image_name>:<tag>
For our example:
docker run -d -p 8080:5000 joker:latest
Replace <host_port> with the port you want to map on your host machine (e.g., 8080), <container_port> with the port your app uses (usually Flask default 50```00), and <image_name> and <tag> as defined before.
Docker Desktop makes managing images, containers, and volumes much easier. Here, we can see the created container, open it in the browser, and even go inside the container using the terminal.
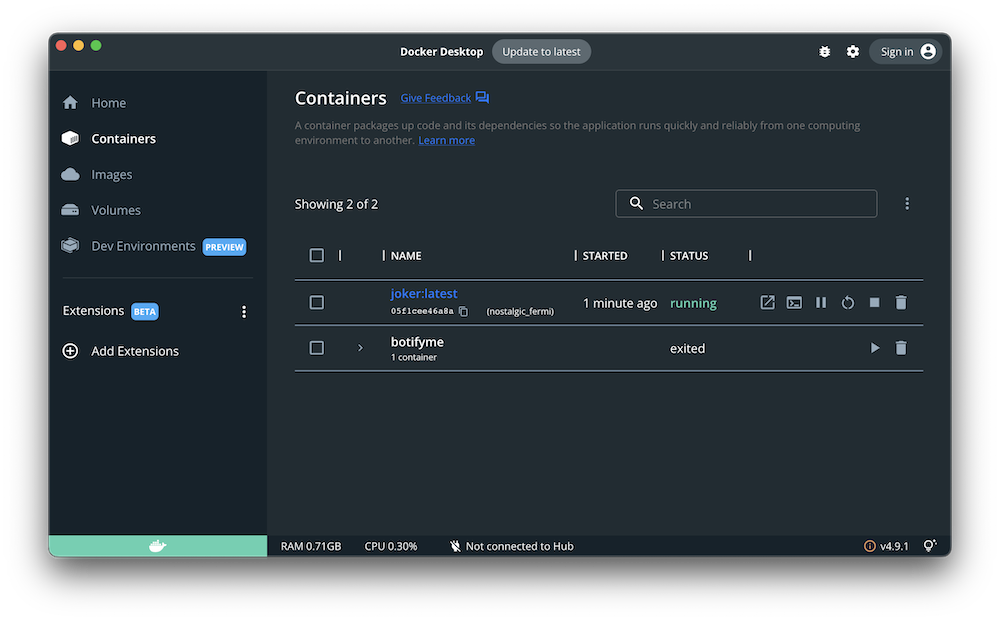
Joker container in Docker Desktop
Additionally, we can use environment variables for configuration instead of hardcoding them in your app.
For complex setups with multiple containers, consider using Docker Compose for easier management. We will explore it in one of my next blog posts :)
Conclusion: Running Flask in Docker
We explored Docker for encapsulating apps in a container to ensure consistency and portability. We used Docker to run our Flask application, which we had developed before. This approach improves app maintainability and provides a standardised workflow. You can use it for various applications, like web services, APIs, databases, and machine learning models.
Flask in Docker FAQ
How do I run a Flask app in Docker?
Write a Dockerfile (Python base image, copy your code, pip install -r requirements.txt, expose the port, CMD ["python", "app.py"]), build it with docker build -t my-flask-app ., then run docker run -p 5000:5000 my-flask-app and open the mapped port in your browser.
What is Docker and why use it for a Flask app?
Docker packages an application with its dependencies into a portable container that runs the same on any machine. For Flask it gives a reproducible environment, so the app behaves identically in development and production without dependency conflicts.
What goes in a Dockerfile for a Flask app?
Start from a Python base image, set a working directory, copy your code and requirements.txt, install dependencies with pip install -r requirements.txt, expose the port, and set the command to run the app (for example CMD ["python", "app.py"]).
How do I build and run a Docker image for Flask?
Build with docker build -t my-flask-app . and run with docker run -p 5000:5000 my-flask-app. The -p flag maps the container port to your host so you can open the app in a browser.
What is the difference between a Docker image and a container?
An image is the immutable template built from your Dockerfile; a container is a running instance of that image. You build an image once and can run many containers from it.
Did you like this post? Please let me know if you have any comments or suggestions.
Python posts that might be interesting for youReferences
Enjoyed this? Get more like it.
Weekly notes on AI tools, Python, and what I'm actually building — plus two free gifts: the 15-page Fantastic AI: The 2026 Toolkit and a Git Commands & Contribution Workflow Cheatsheet.
