Authenticating to GitHub with Personal Access Tokens
GitHub is a web-based platform for version control and collaboration that lets developers work together on projects from anywhere. One feature that makes Git authentication both secure and flexible is the personal access token (PAT).
In this post, I explain how to create and use personal access tokens, an excellent way to access and update Git repositories over HTTPS.
What Is a GitHub Personal Access Token (PAT)?
A GitHub personal access token (PAT) is a credential that authenticates Git operations and API requests in place of your account password. It is a unique string that grants scoped access to your account, repositories, and other services without exposing your login credentials. You can create a token with specific permissions and revoke it anytime, giving you fine-grained control over your account’s security.
I like using personal access tokens instead of passwords when authenticating to GitHub in the command line or with the API. You can pull and push, do commits and do any repository manipulations you need with the personal access tokens expressly set up for your application and required level of access.
How to Create a GitHub Personal Access Token
To have a simple setup, I have my remote repository named “origin”, wherein I push my code updates. This is a traditional setup; however, you can call it as you like. I stick with the “origin”.
Please note that should you already have the “origin” defined in your Git client, you might first delete the “origin”. Alternatively, you skip this step and define another alias for your remote repository.
If git remote add origin later returns error: remote origin already exists, the alias is still defined. Remove it first with git remote remove origin, then re-add it. See my dedicated post Git: “origin already exists” and how to manage remotes for the full fix.
To create a personal access token, go to the GitHub website and log in to your account.
Next, we go to the GitHub developer settings page, which is available just below your user icon in the dropdown menu “Settings”. Follow to the left panel to see “Developer Settings” and “Personal access tokens”.
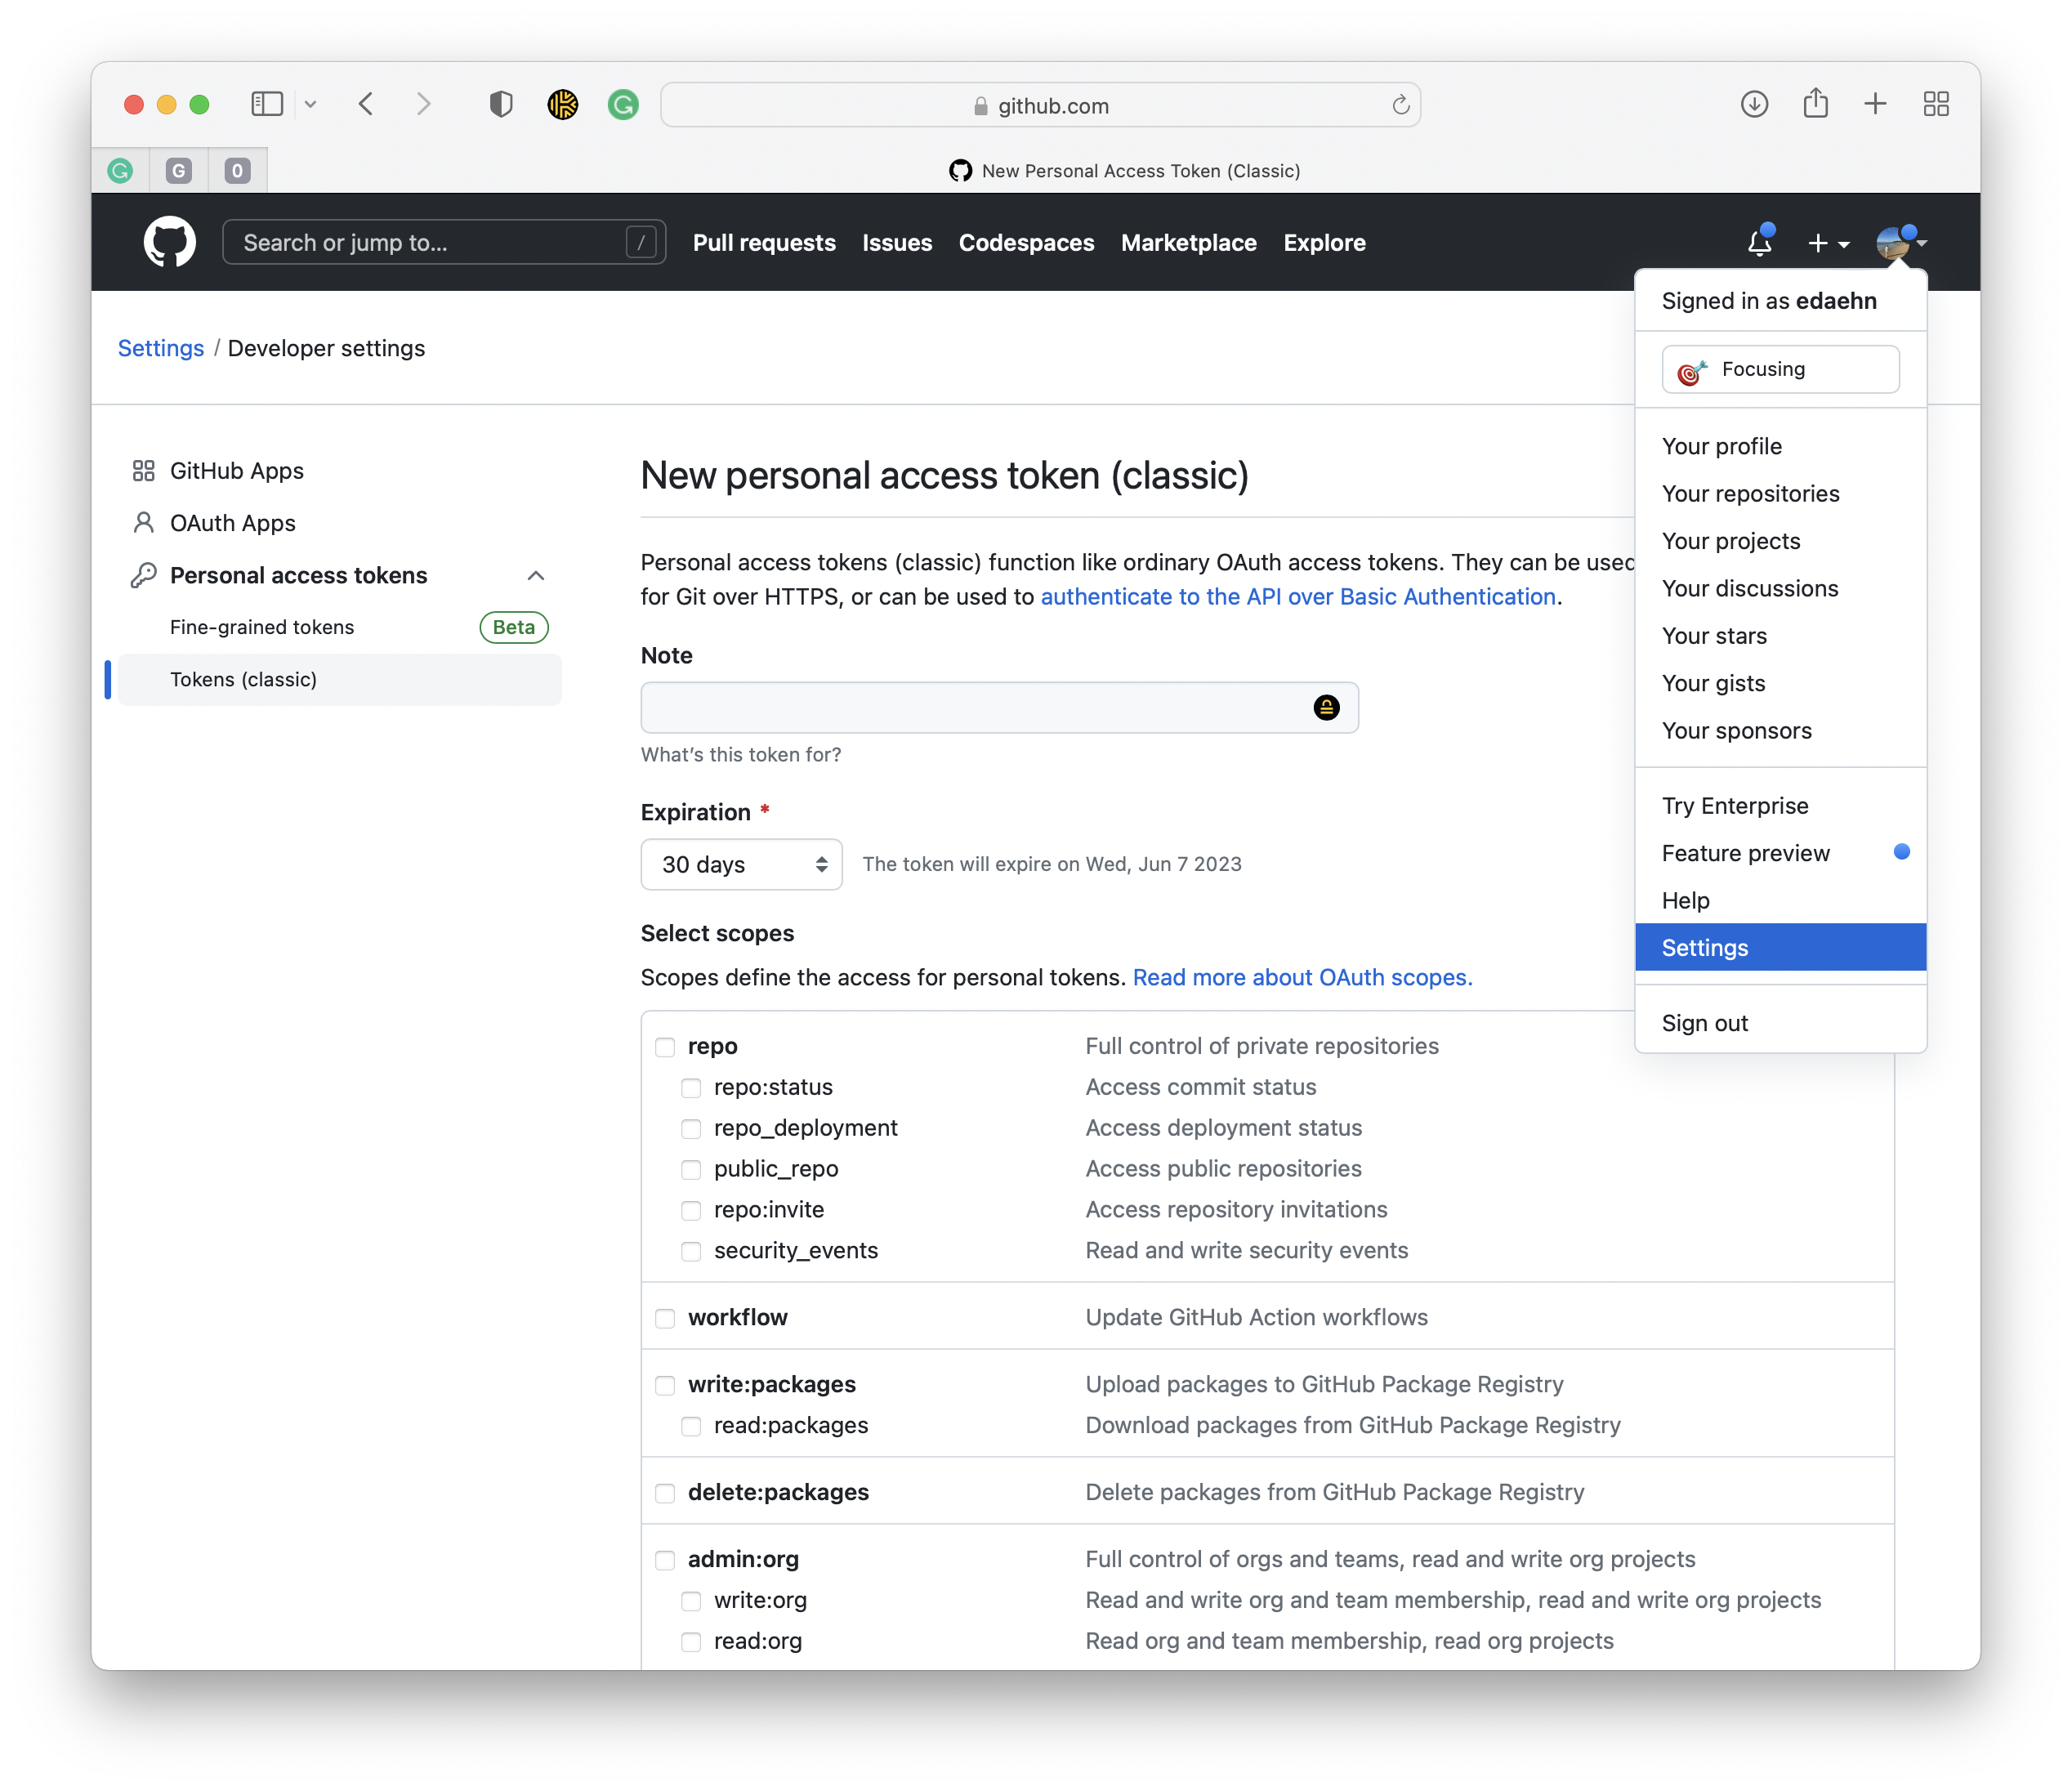
GitHub Developer Settings under your profile icon
At the moment, you have two options there:
- Fine-grained tokens (Beta) help generate API tokens for scripts and tests.
- Tokens (classic) can be helpful to access the GitHub API.
I use the classic tokens to access GitHub over HTTPS since I don’t like typing in my credentials while doing my commits and little updates.
Update: GitHub now recommends fine-grained personal access tokens for new projects, since they let you scope access down to a single repository. Classic tokens remain supported at the time of this update — mainly for use cases like Gist access or GitHub Packages that fine-grained tokens don’t yet cover — but check the fine-grained tokens documentation before defaulting to classic.
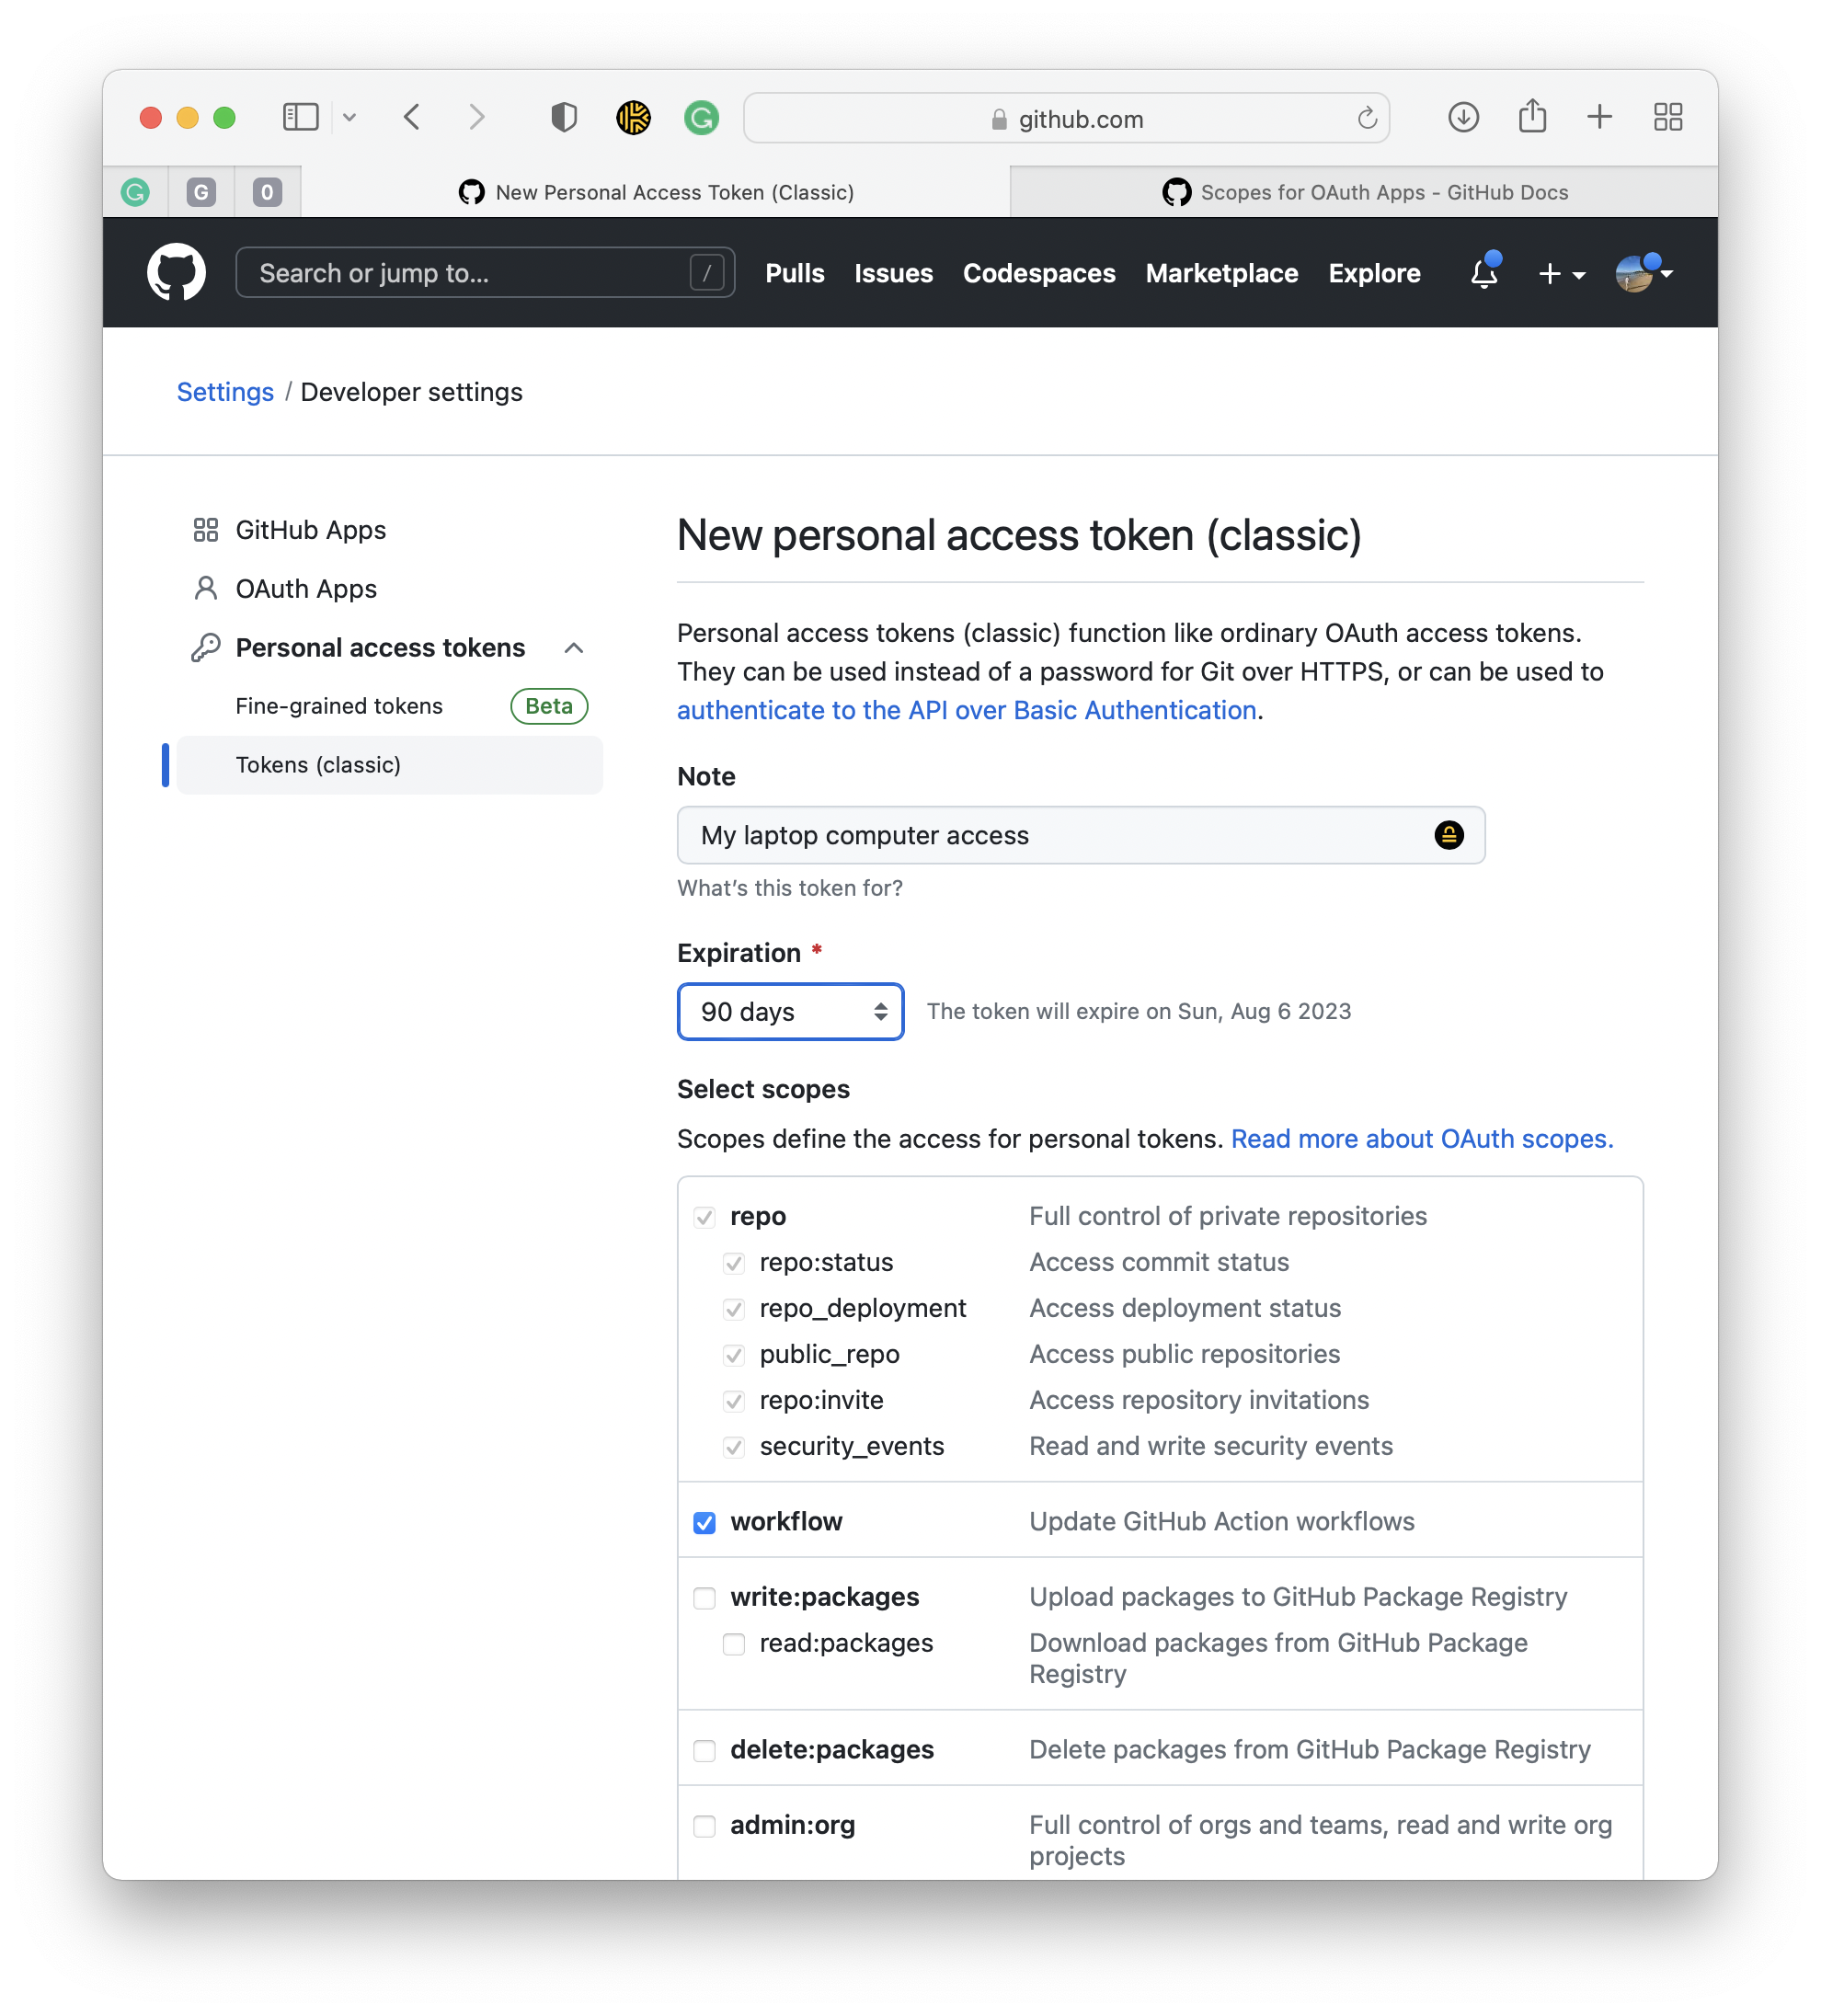
GitHub Developer Settings, personal access tokens
I usually give a descriptive name for my token, but you can also provide a description that is misleading to potential mischief :)
When creating a new classic access token, you must define access scopes.
You need to decide what you want to do with your access token — managing private repositories, updating action workflows, managing your codespaces, and many other permissions explained in the GitHub docs section “Scopes for OAuth Apps”.
It is also essential to define your access token’s expiration time to protect its security.
When we click on the “Generate token” button at the bottom of the page, our new token will be displayed on the screen, so make sure to copy it and store it securely, as it won’t be shown again. You will need it soon.
Next, you go to your local directory with the repository and add your access token with the origin alias into the URL as follows:
git remote add origin https://[token]@github.com/[username]/[repository]
How to Use a Personal Access Token to Push to GitHub
🔒 Subscribe to keep reading.
Conclusion: Personal Access Tokens for Secure GitHub Authentication
🔒 Subscribe to keep reading.
References
🔒 Subscribe to keep reading.
You've hit a Deep Dive tutorial.
I spend dozens of hours researching, coding, and breaking things to write these guides. This content is free, but reserved for my subscriber community. Drop your email below to unlock this guide (and all past/future deep dives):
Full content temporarily unavailable — refresh in a moment
Already a subscriber? Use the magic link from your last newsletter, or reset your password.
Log in to unlock
New subscribers get an inbox mail: Set a password to unlock articles. The form does not log you in — use the same email afterwards.